
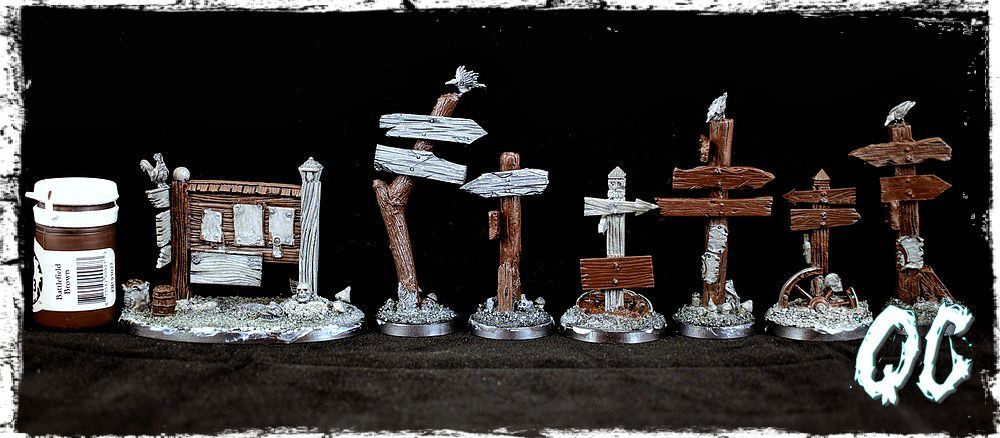
Przy okazji prezentacji na DansE MacabrE makiety przedstawiającej Plac Trzech Tronów do Warheim FS szanowne państwo-draństwo pytało w kilku miejscach w sieci jak maluję drewno.
Ponieważ nie jest to trudne, postanowiłem zaprezentować wam mój pomysł na malowanie starego i świeżego drewna na przykładzie drogowskazów i tablicy ogłoszeń od Mini Monsters oraz Ristuls EM, których będę używał w czasie rozgrywek w Warheim FS.
Poniżej krok po kroku pokazałem wam kolejne etapy malowania starego drewna. A tutaj znajdziecie wszystkie części poradnika:
A jeżeli chcecie dokładniej obejrzeć zestawy, których użyłem to kliknijcie w poniższe odnośniki:
|
On the occasion of the presentation in the blog DansE MacabrE finished model of the Square of Three Thrones for the battle game Warheim FS you asked me how I paint wood.
Because it is not difficult, I decided to present you my idea of painting old and fresh wood on the example on set Signposts and Wooden Road Signs from Mini Monsters and Ristuls Extraordinary Market that I will use during the Warheim FS game. Below step by step I showed you step by step painting old wood. And here you will find links to individual parts of the guide:
|

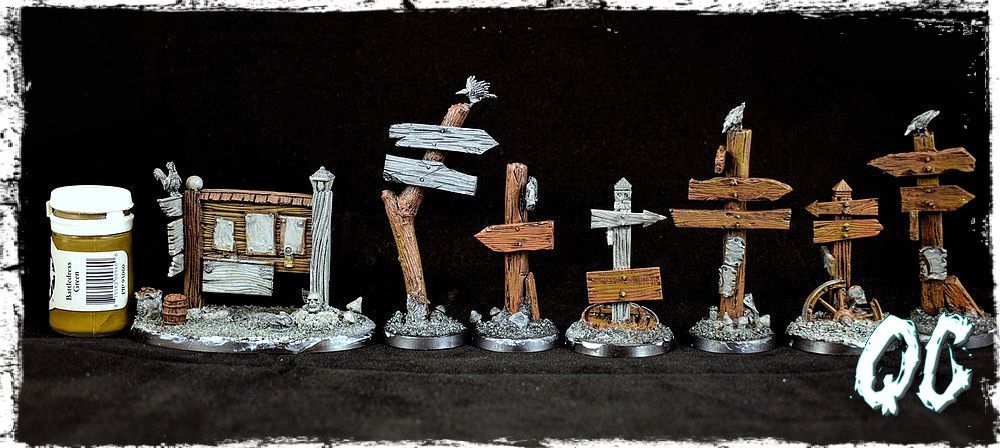
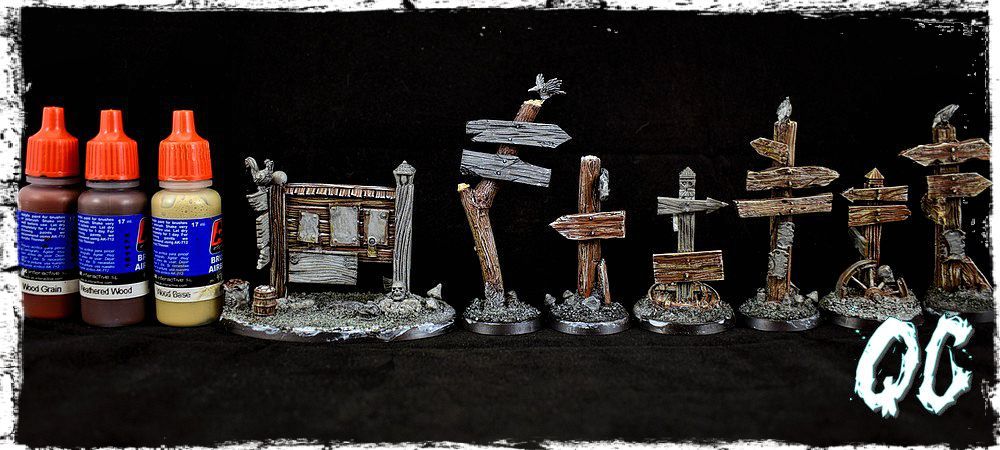
Do malowania starego drewna użyłem następujących farb, które wymieniłem mniej więcej w kolejności użycia:
Na tym etapie nie trzeba przykładać zbyt dużej wagi do dokładności, farbę nakładałem techniką 'prawie' suchego pędzla. |
I used the following paints for painting old wood. I selected the paint in the order in which I used them to paint.
At this stage you do not have to be too cautious and careful, because the layers of paint I applied 'almost' dry brush. |
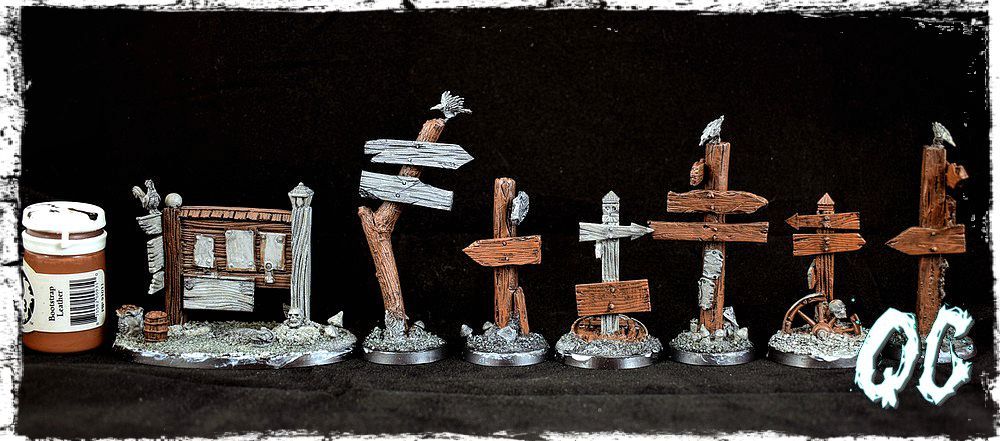
Teraz przyda się wam trochę więcej cierpliwości, dokładności i mniejszy pędzel.
Przy użyciu farb Wood Base i Wood Grain oraz Weathered Wood z palety AK, ozdobiłem stare drewno słojami, malując je tak, by pasowały do faktury drewna wyrzeźbionej przez producenta.
Tutaj warto się trochę przyłożyć, bo efekt będzie widoczny po zakończeniu prac. |
Now you will need a little more patience, accuracy and smaller brush.
Using Wood Base and Wood Grain paints and Weathered Wood from the AK palette, I decorated old wood tree rings, painting them to match the texture of wood carved by the manufacturer. Here it is worth a try, because the effect will be visible after the work. |
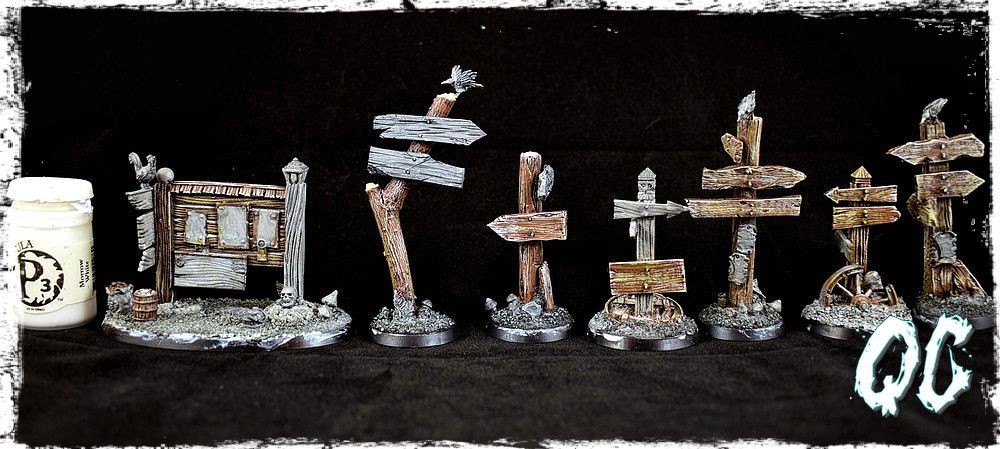
Następny krok to rozjaśnienie krawędzi farbą Morrow White z palety P3, którą nałożyłem ostrożnie na elementy tak, by zasugerować oświetlenie ich z góry i prawej strony.
|
The next step is to brighten the edges of the Morrow White paint from the P3 palette, which I carefully placed on the elements to suggest lighting them up and to the right.
|
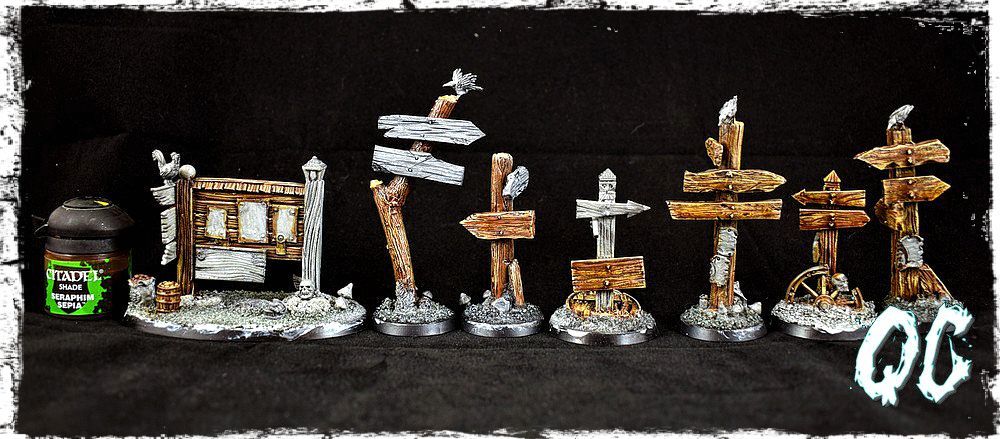
Przedostatni krok, to nałożenie washa. Najpierw użyłem Seraphim Sepia z palety GW, a następnie Light Grey oraz Dark Grey od Vallejo.
Seraphim Sepia nałożyłem na całość, natomiast Light Grey oraz Dark Grey użyłem dużo ostrożniej wpuszczając wash w miejsca łączenia elementów oraz od dołu i z lewej strony wzmacniając cienie. |
The next step is to apply the wash. First I used Seraphim Sepia from GW palette, then Light Gray and Dark Gray from Vallejo palette.
Seraphim Sepia I put on all the elements, while Light Grey and Dark Grey I used a lot more carefully put the wash in the places of connection elements and from the bottom and the left side to strengthen the shadows. |

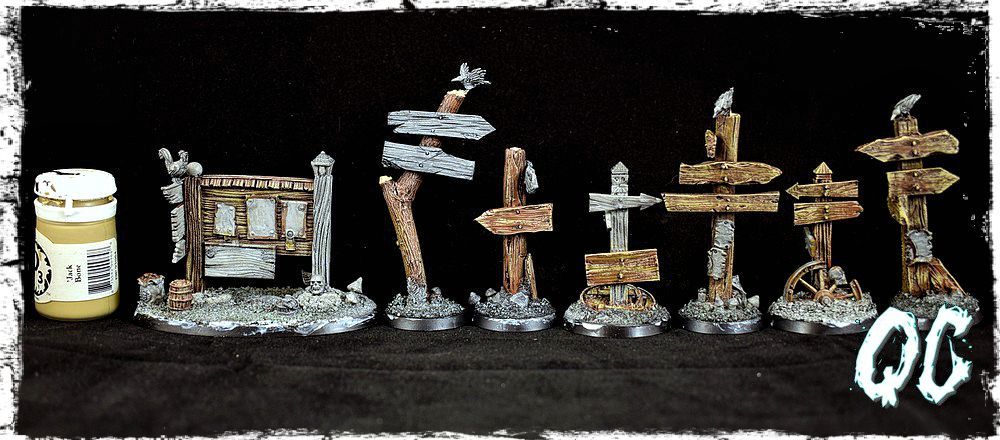
Ostatni etap to postarzenie drewna. Do tego celu użyłem farby Ironhull Grey, której kolejne warstwy rozjaśniałem dodając trochę Morrow White.
Farbę nakładałem ostrożnie metodą suchego pędzla na krawędzie i powierzchnie szczególnie wystawione na działanie warunków atmosferycznych. |
The last stage is aging wood. For this purpose I used Ironhull Gray paint, the next layer I cleared by adding a little Morrow White paint from P3.
Apply the paint carefully with a dry brush, focusing on the edges and surfaces, which could be exposed to atmospheric conditions. |
To wszystko na dzisiaj.
W kolejnej części poradnika pokażę wam jak maluję nowe drewno. |
That's all for today.
In the next part of the guide I will show you how I paint new wood. |
Będzie mi miło jeśli pozostawicie po sobie komentarz i udostępnicie ten post. Jeśli chcecie postawić mi kawę przycisk DONATE znajduje się poniżej.
|
I will be happy if you leave comments and share this post with friends. If you want to put me a coffee DONATE button is below.
|
dołączenia do BLOGOSFERY oraz komentowania wpisów!
Zapraszam także na forum AZYLIUM, które skupia graczy
Mordheim i Warheim FS.
Zapraszam także na forum AZYLIUM, które skupia graczy
Mordheim i Warheim FS.
Brak komentarzy:
Prześlij komentarz