
| W roku końca świata pozwoliłem sobie pokazać Wam jak zrobić zdjęcia modeli na gradientowym tle, gdy do dyspozycji ma się tylko kartkę białego papieru. Dziś, po raptem 6 latach, przygotowałem dla Was kolejny, podzielony na 6 części poradnik, w którym pokażę Wam krok po kroku jak przygotowuję zdjęcia do publikacji:
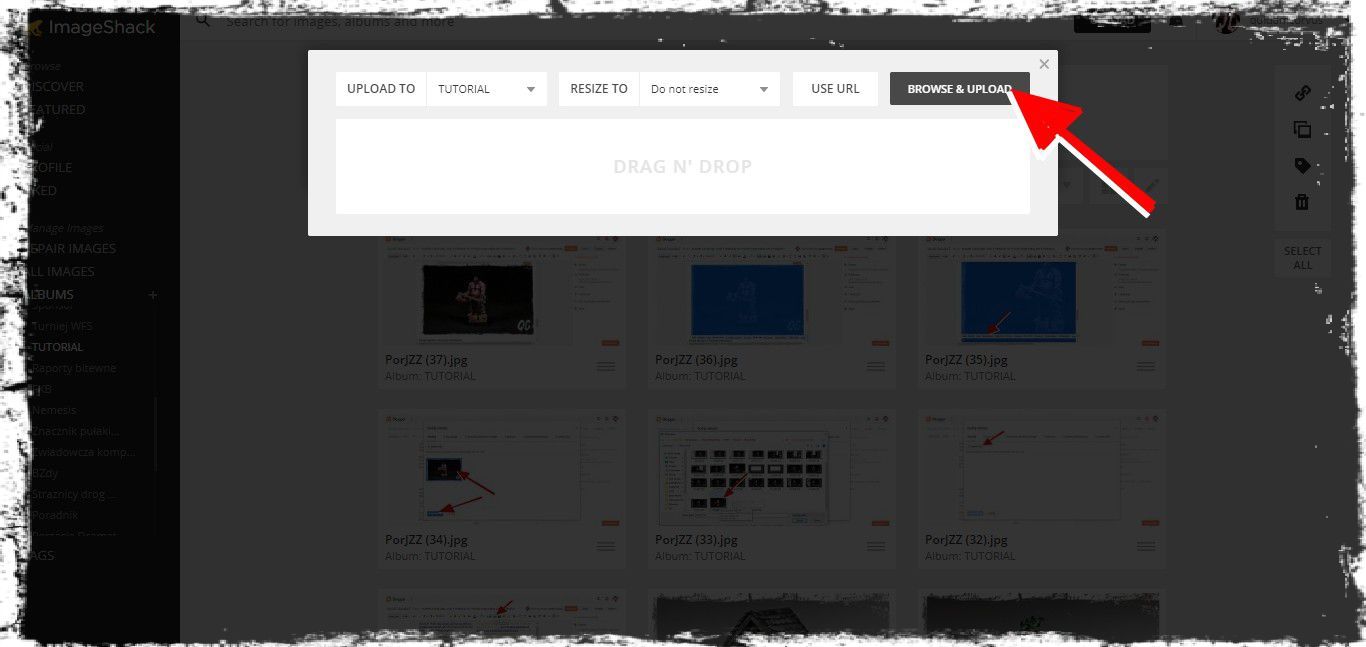
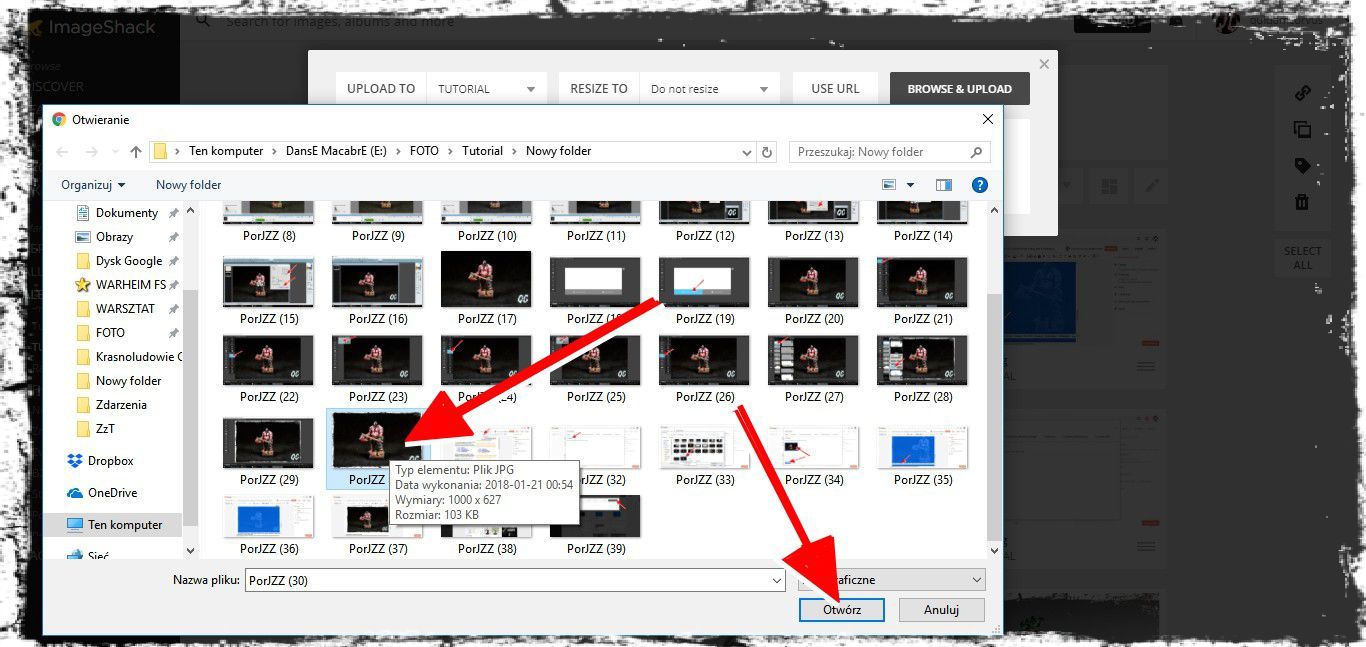
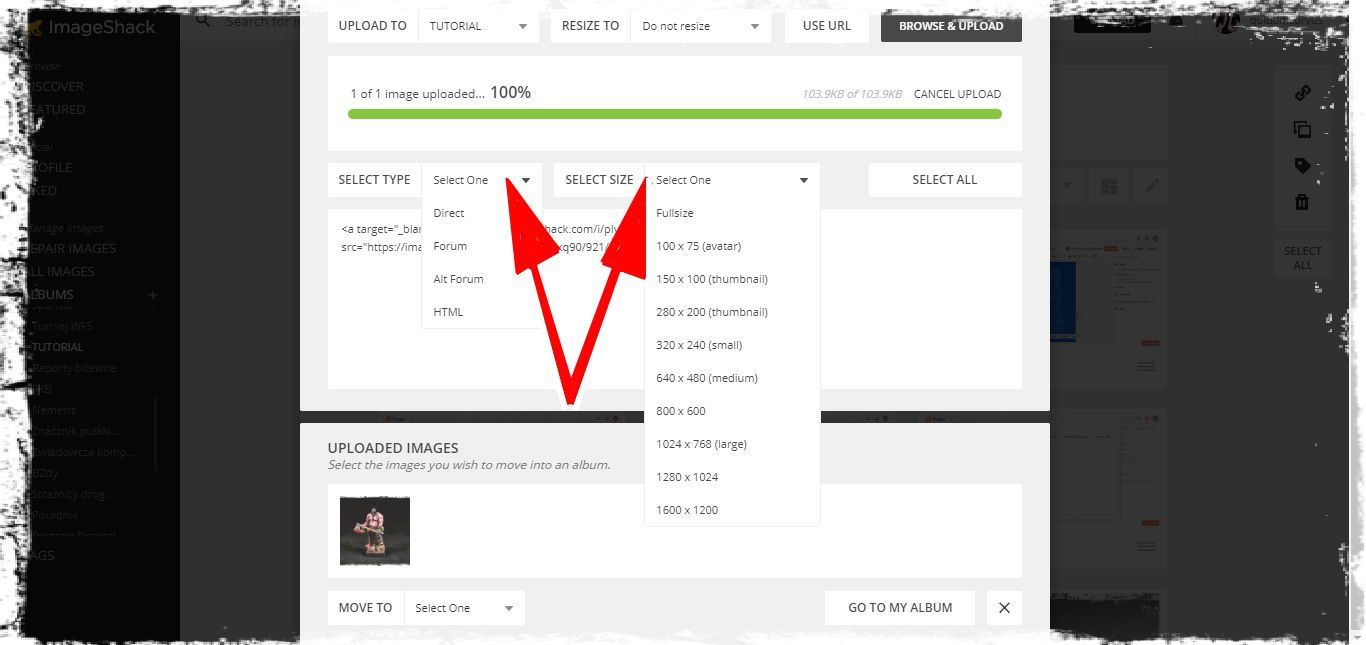
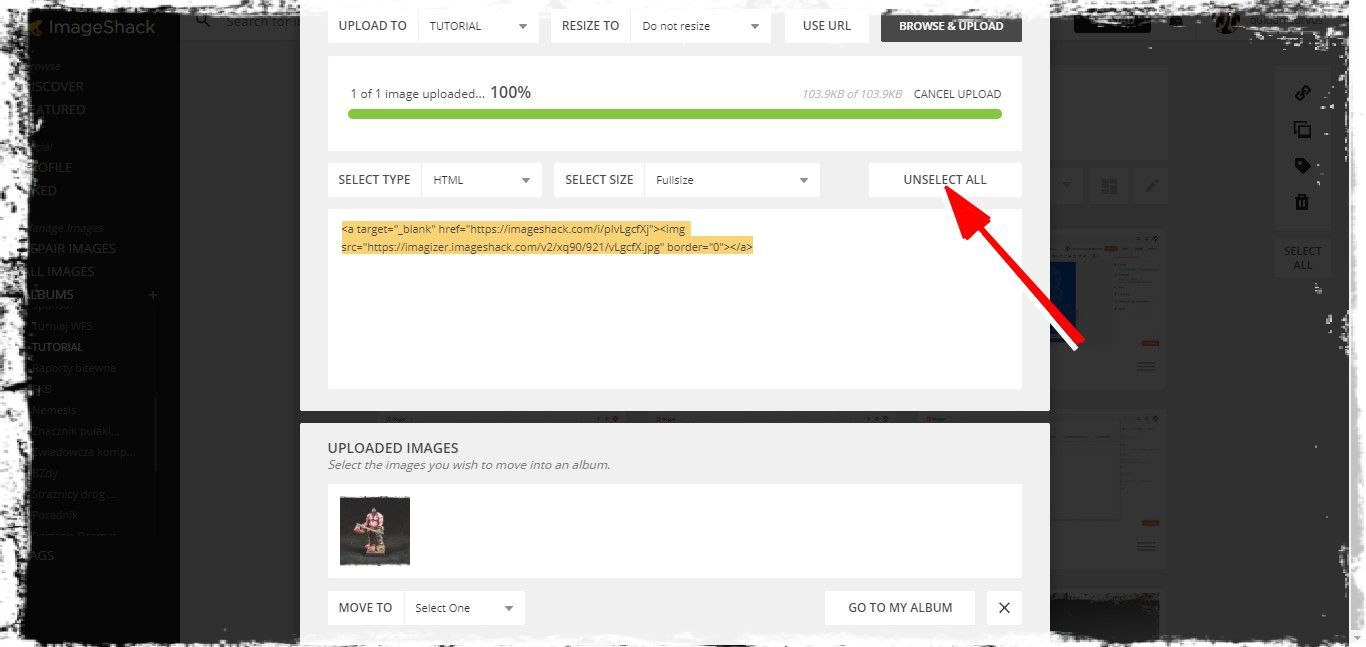
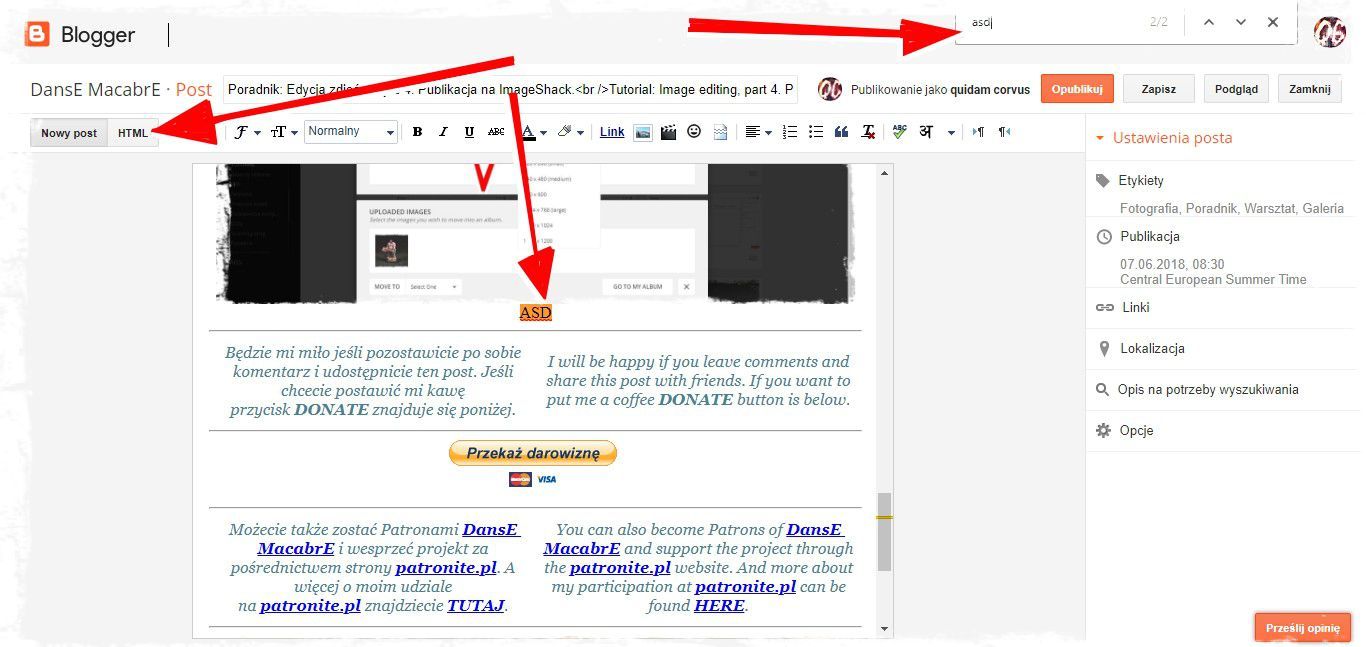
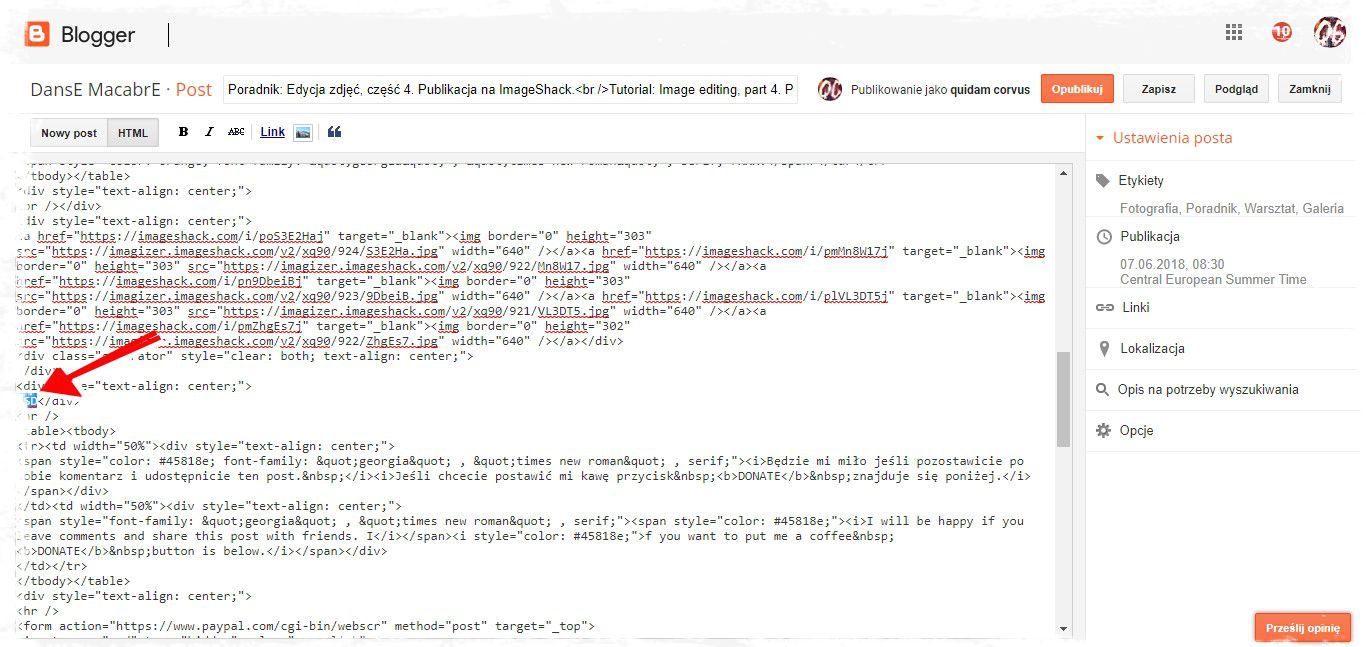
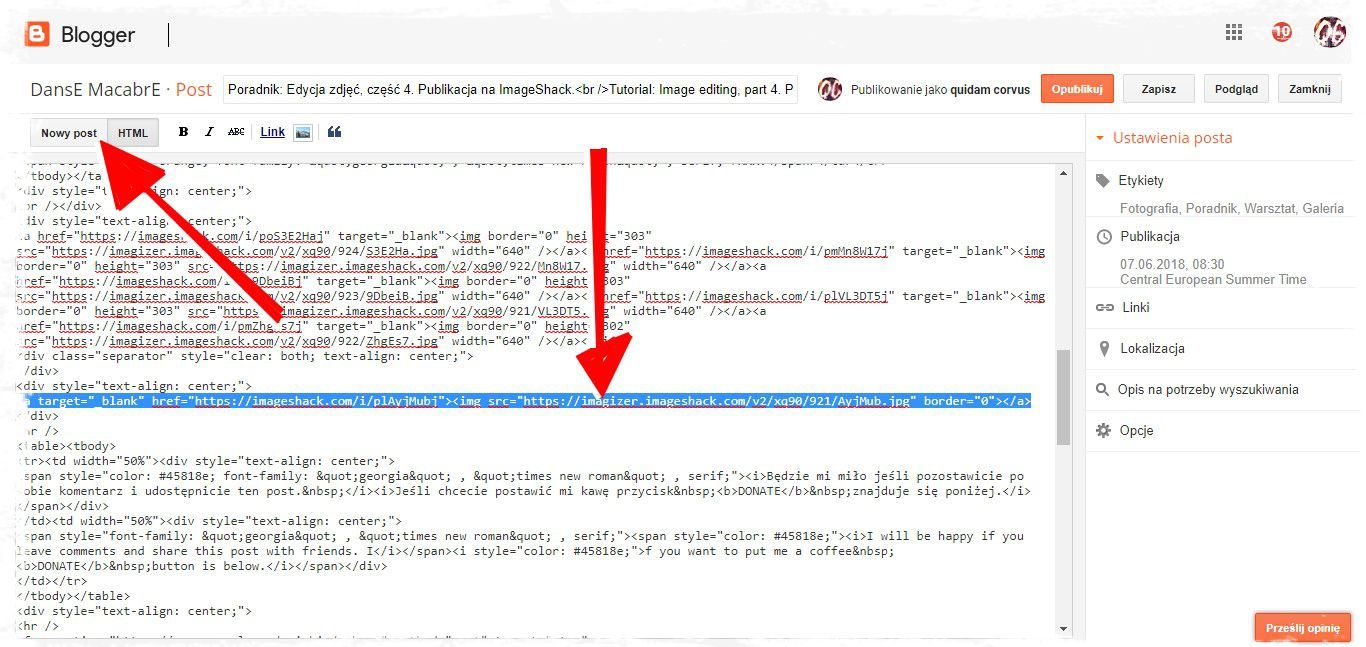
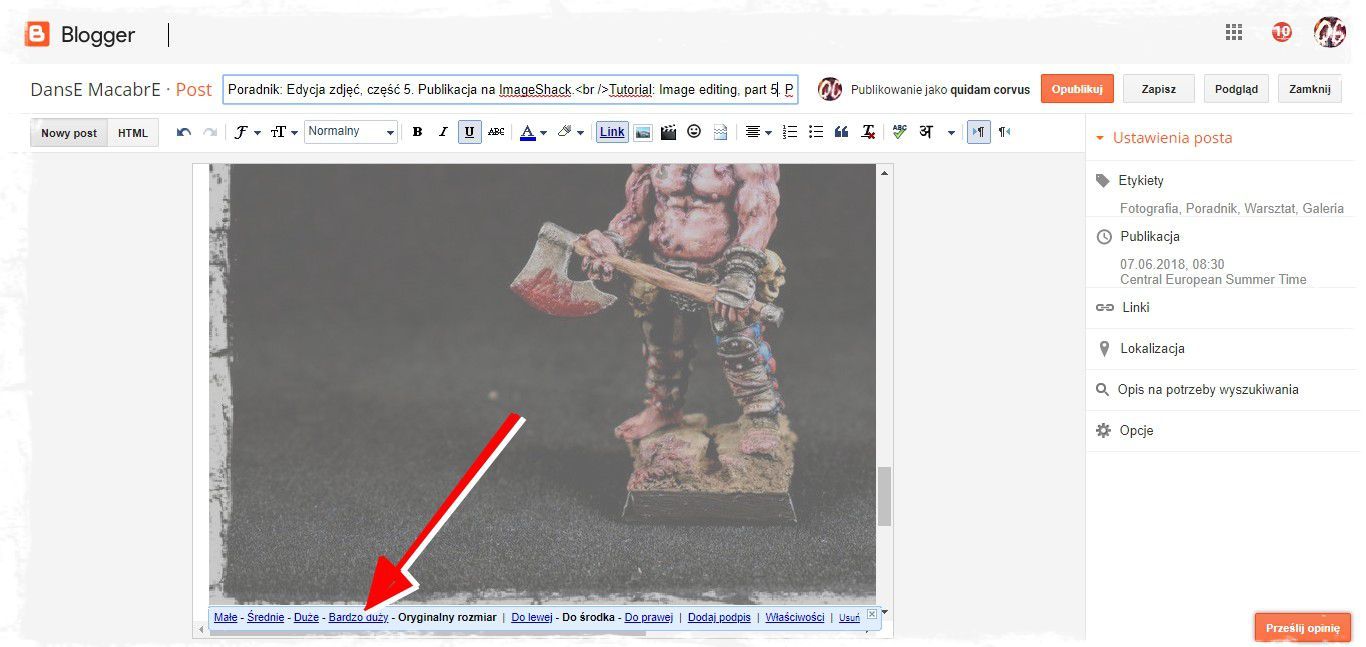
Na bloggerze zdjęcia publikuję na dwa sposoby. Druga metoda, z której korzystam najczęściej to przesłanie zdjęć na serwery imageshack, a następnie wklejenie kodu z odnośnikiem do zdjęcia na bloga. Imageshack nie jest pewnie najlepszym, co można znaleźć w sieci, choćby dlatego, że jest płatny i trzeba wykonać więcej czynności niż w przypadku publikowania na bloggerze. Dla mnie ma jednak tę zaletę, że jest łatwy i intuicyjny w obsłudze oraz w prosty sposób pozwala na publikację zdjęć zarówno na bloggerze jak i forach internetowych, na których bardzo często zamieszczam zdjęcia. Po zalogowaniu się na stronę imageshack klikam na znajdujący się w prawym górnym rogu przycisk upload, a następnie browse and upload i wybieram interesujące mnie zdjęcie i zatwierdzam przyciskiem otwórz. Po wgraniu zdjęcia imageshack pozwala zarówno na wybór kodu odpowiedniego dla medium na którym opublikujemy zdjęcia, a także na wybór rozmiaru publikowanego zdjęcia. Wybieram opcję html i klikam na przycisk select all, który podświetla fragment kodu i zmienia się na unselect all. Dla pewności kopiuję prawym przyciskiem myszki podświetlony fragment kodu i przechodzę do okna bloggera. W miejscu w którym ma znaleźć się zdjęcie wpisuję ciąg znaków, w tym przypadku ASD, a następnie zmieniam tryb wyświetlania okna posta za pomocą przycisku HTML, który znajduje się w prawej górnej części ekranu. Kombinacją klawiszy ctrl+f otwieram okno wyszukiwania i wpisuję ciąg znaków ASD. Po podświetleniu przez wyszukiwarkę zamieniam ciąg znaków ASD na kod skopiowany z imageshack. Zmieniam tryb wyświetlania okna klikając w przycisk nowy post, a następnie zmieniam rozmiar zdjęcia na bardzo duży. I gotowe. | In the year of the end of the world, I allowed myself to show you how to take pictures of models on a gradient background, when you only have a sheet of white paper. Today, after just only 6 years, I prepared another guide for you, divided into 6 parts, in which I will show you step by step how I prepare photos for publication on the blog:
I publish photos on the blogger in two ways. The second method that I use most often is sending photos to imageshack servers, and then pasting the code with the link to the photo on the blog. Imageshack is probably not the best you can find on the web, for example because it's paid. To publish a photo, you also need to do more than publish using the bloggers built-in tool. For me, however, it has the basic advantage, that it is easy and intuitive to use and easily allows you to publish photos on both the blogger and online forums, where I often put photos. After logging into the imageshack page, I click on the upload button located in the upper right corner, then browse and upload and select the photo that interests me and confirm with the open button. After uploading images, imageshack allows you to choose the appropriate code for the medium on which we will publish the pictures, as well as to choose the size of the published photo. I select the html option and click the select all button, which highlights the code snippet and changes to unselect all. To be sure, I am copying the right part of the code with the right mouse button and going to the blogger's window. To make it easier to edit a post, in the place where you want to find a picture, I enter a string of characters, in this case ASD, and then change the display mode of the post window using the HTML button, which is located in the upper right part of the screen. With the ctrl+f key combination, I open the search window and type the ASD string. After highlighting by the search engine, I change the ASD string to the code copied from imageshack. I change the window display mode by clicking the new post button, and then I change the size of the image to a very large one. And ready. |
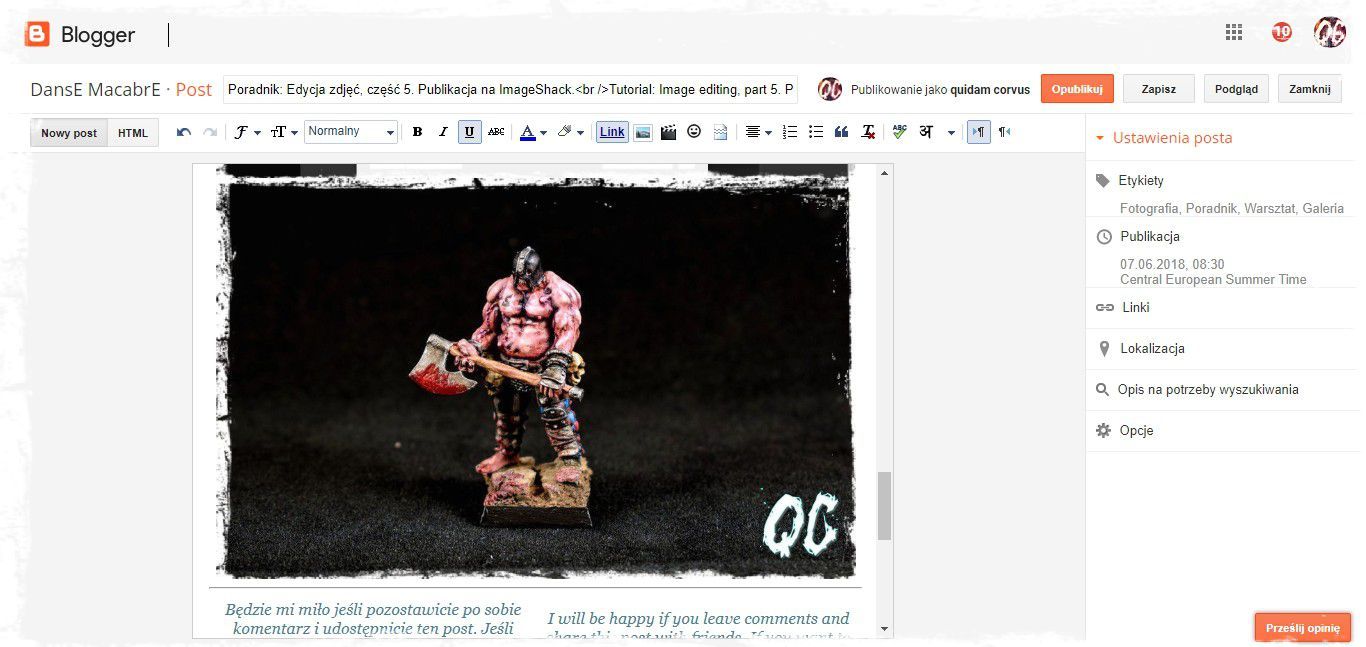
Będzie mi miło jeśli pozostawicie po sobie komentarz i udostępnicie ten post. Jeśli chcecie postawić mi kawę przycisk DONATE znajduje się poniżej.
|
I will be happy if you leave comments and share this post with friends. If you want to put me a coffee DONATE button is below.
|
Możecie także zostać Patronami DansE MacabrE i wesprzeć projekt za pośrednictwem strony patronite.pl. A więcej o moim udziale na patronite.pl znajdziecie TUTAJ.
|
You can also become Patrons of DansE MacabrE and support the project through the patronite.pl website. And more about my participation at patronite.pl can be found HERE.
|

dołączenia do BLOGOSFERY oraz komentowania wpisów!
Zapraszam także na forum AZYLIUM, które skupia graczy
Mordheim i Warheim FS.
Zapraszam także na forum AZYLIUM, które skupia graczy
Mordheim i Warheim FS.
Brak komentarzy:
Prześlij komentarz